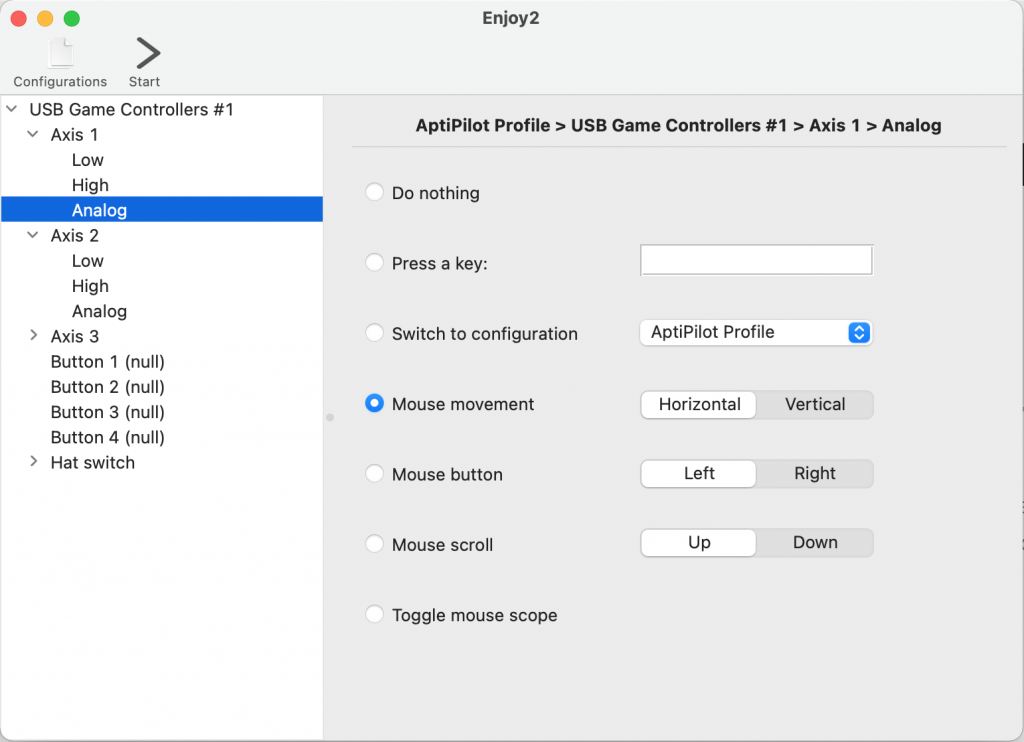
A number of our tests require the use of a joystick (follow and crosshairs). To use a joystick with these tests an external program is required to translate the movement of the joystick into a mouse movement. Follow the instructions below for your relevant device.
PC users
Step 1
Download ‘Joy2Key’.
Step 2
Unzip Joy2key. For instructions please visit this site.
Step 3
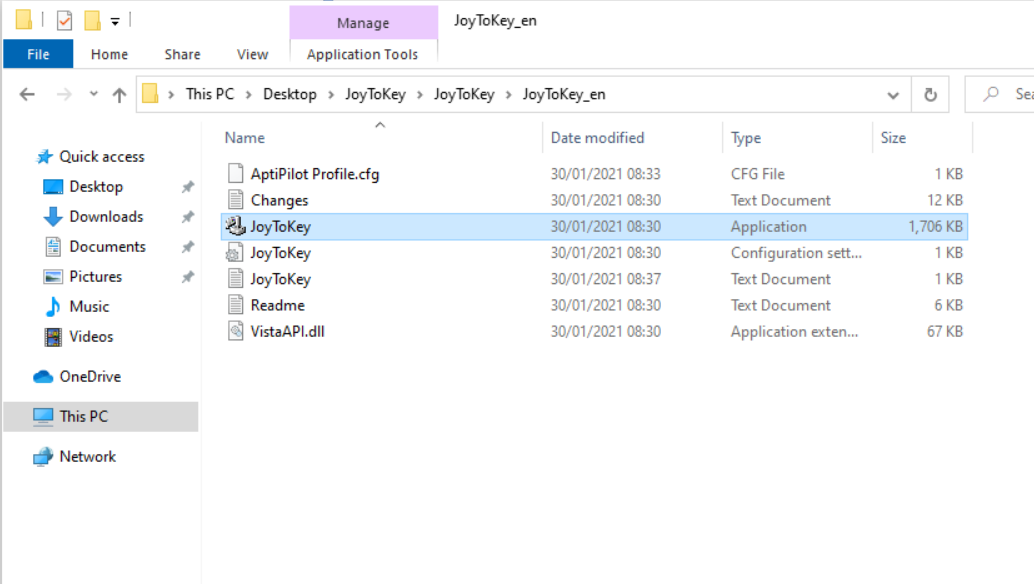
Open the application here:
Step 4
Please ensure Joy2key remains running (minimised and not closed)
JoyToKey may ask for a licence key to be purchased to use the software. This is not the case and you may ignore these messages.
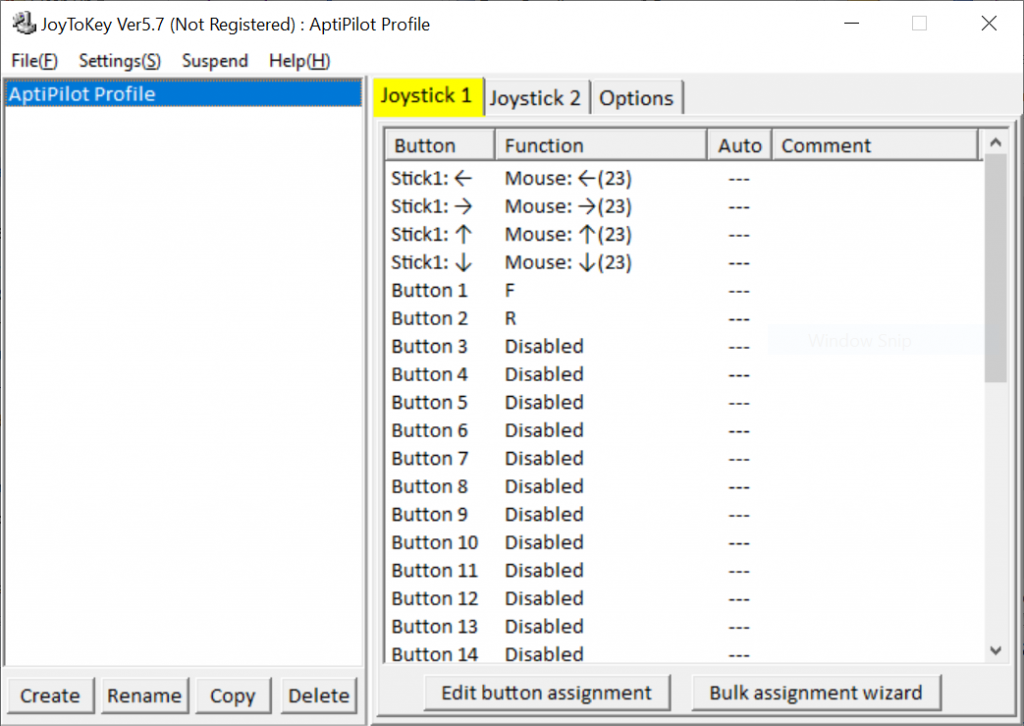
Below is how the installed software looks once installed and running.
Please keep the application running when running any test requiring joystick input.
Mac users
Step 1
Download ‘Enjoy2’ AND ‘Config-profile’.
AND
Step 2
Unzip Enjoy2.zip and Config-profile.zip. This should happen automatically. If not double click the file to start Unzipping.
Step 3
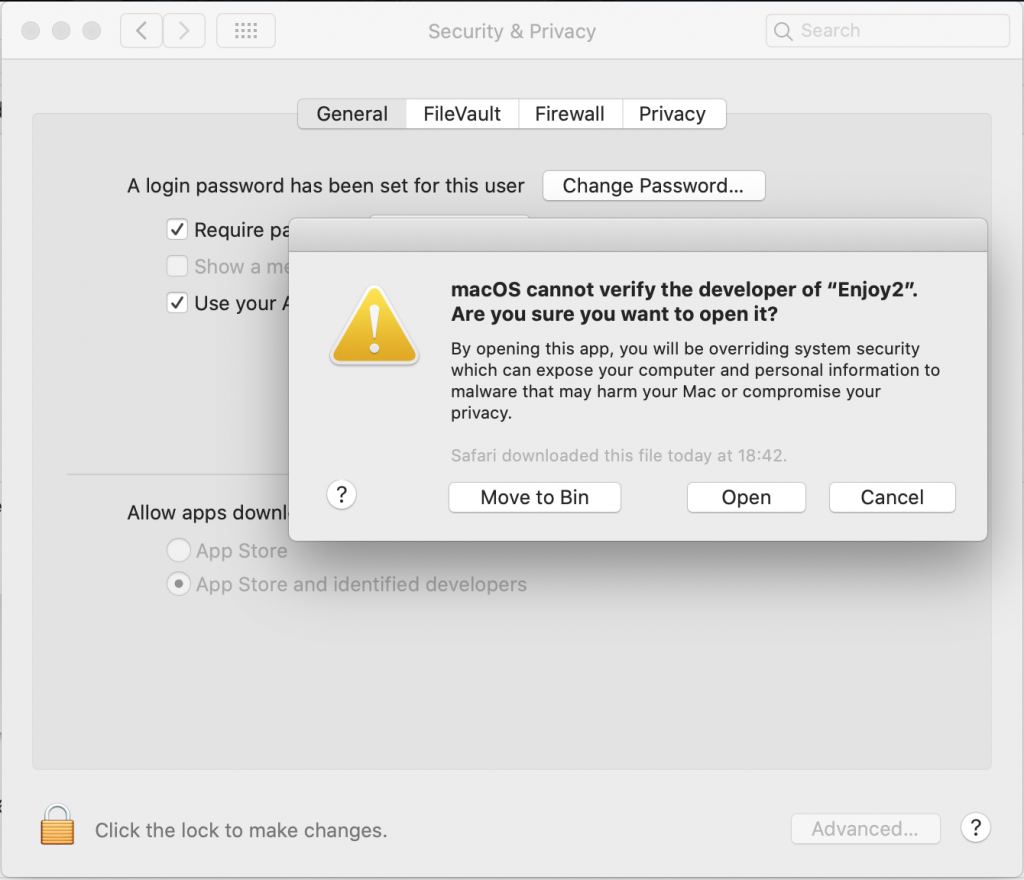
Open Enjoy2. The following error message is likely to appear:
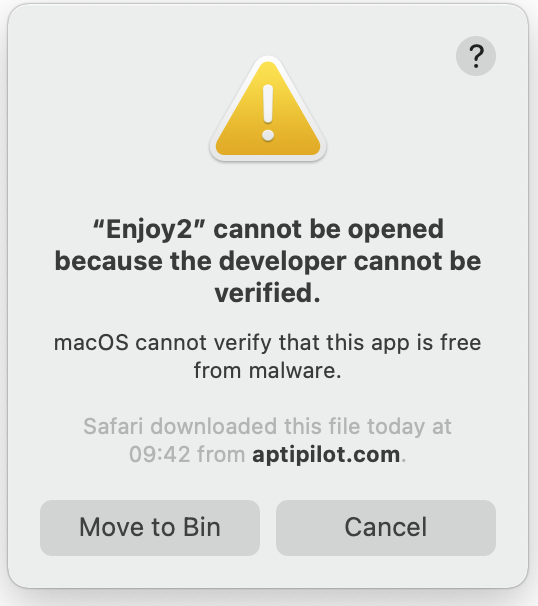
Click ‘Cancel’ and go to: System Preferences -> Security & Privacy
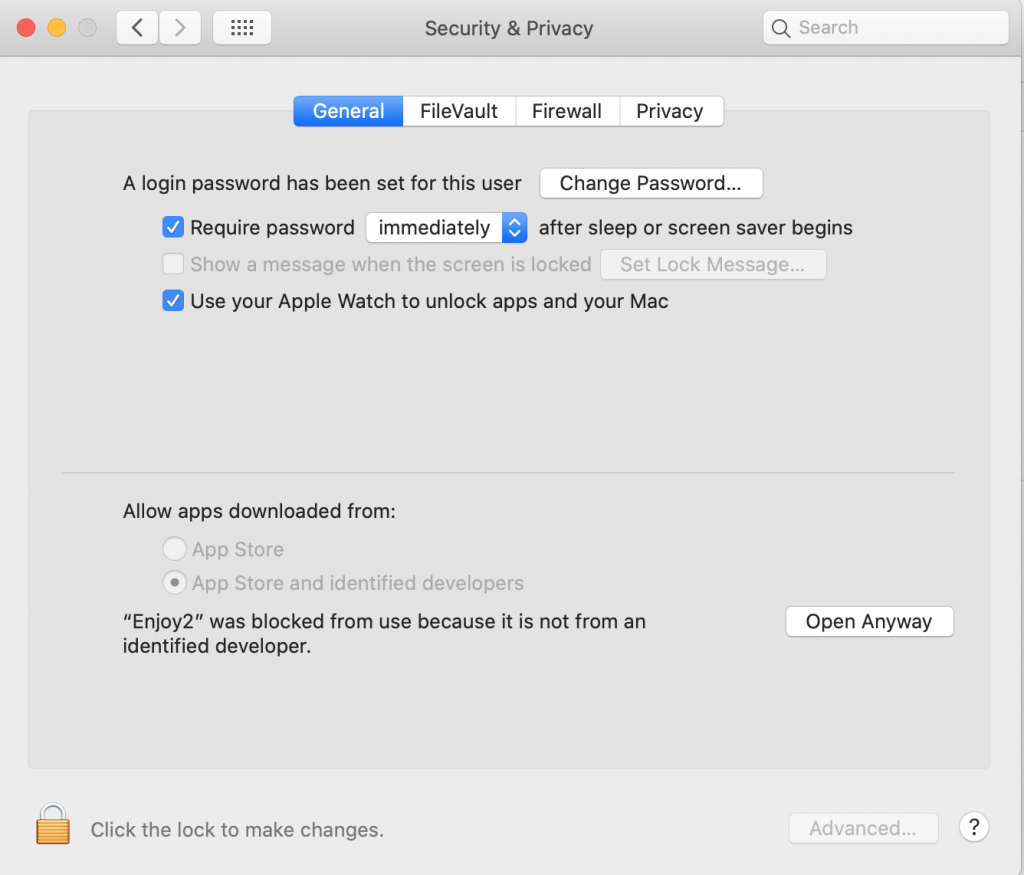
On the General tab, click ‘Open Anyway’
Click ‘Open’.
The application should now open and no further error messages should appear when the application is opened in the future.
Step 4
Restart your Mac to complete installation and allow the setup folders to appear to complete the next step.
Step 5
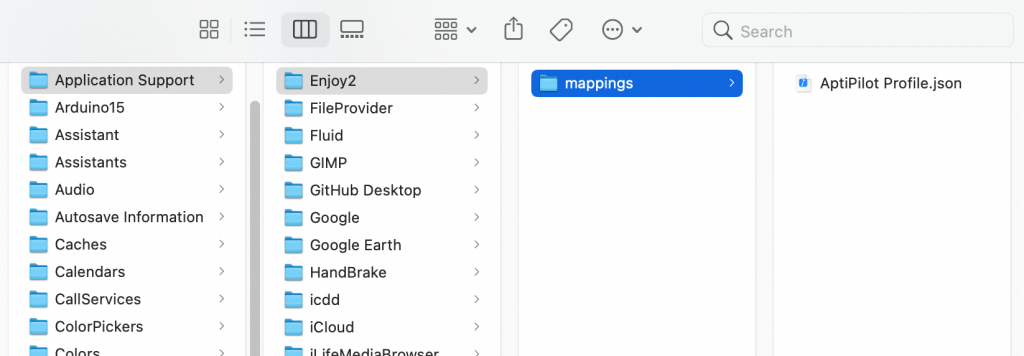
Move the ‘AptiPilot Profile.json’ file to the ‘mappings’ folder at the address below (replace YOUR_USERNAME with your Username):
Users/YOUR_USERNAME/Library/Application Support/Enjoy2/mappings
Delete any other files in this folder. All you should see is the AptiPilot Profile.json.
Step 6
A warning may appear when you start Enjoy2 or when you click Start in the application nothing may happen. Please check in System Preferences -> Security & Privacy. And then click the Privacy tab and Accessibility on the left. Ensure Enjoy2’s checkbox is checked.
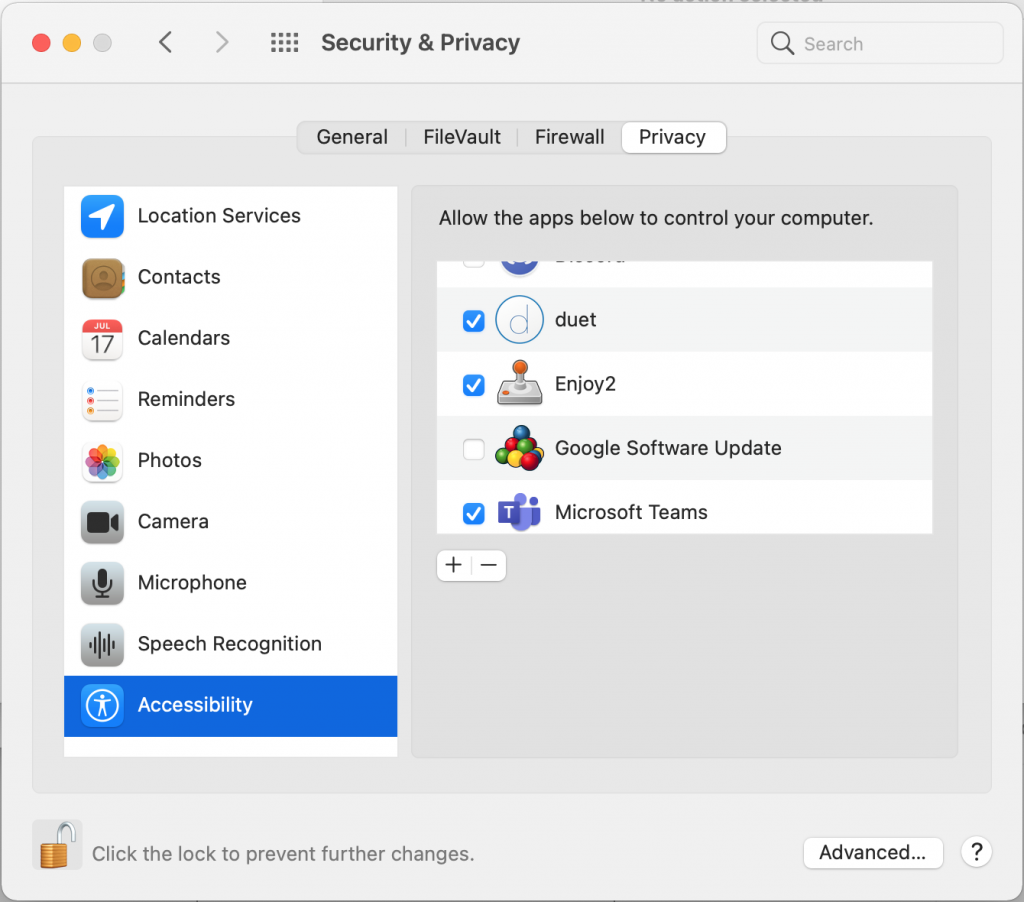
You may need to unlock to make changes. Simply click the padlock symbol at the bottom and enter your password when prompted.

Step 7
The application should now run with the AptiPilot Profile shown on the left (you may need to press the ‘Configurations’ button to see this). Click ‘Start’ and you should now be able to control the mouse movements with your joystick!
Please keep the application running when running any test requiring joystick input.
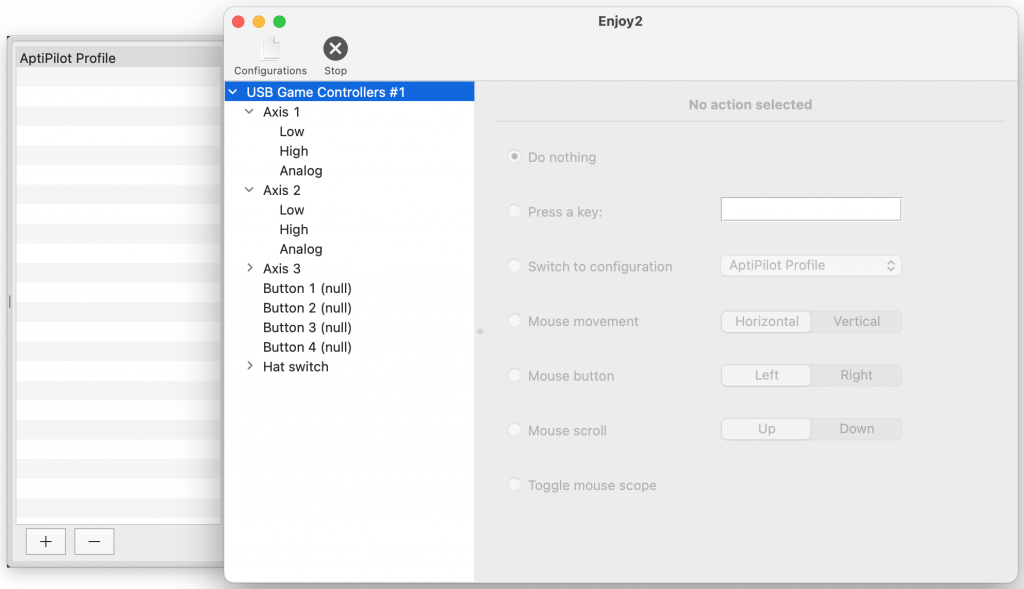
Step 8 (Optional)
If ‘AptiPilot Profile’ is not shown or nothing happens when you move your joystick you can manually edit the profile. Connect your joystick and change the following:
• Axis 1 – Analogue -> Mouse movement (Horizontal)
• Axis 2 – Analogue -> Mouse movement (Vertical)
• Button 1 – Press a key -> F
• Button 2 – Press a key -> R
